How this guide was verified
Verified boards and strategy, not invented button strings
The source video proves the board states below, while the recovered project proves each chamber's Par setting. Where the sampled footage cannot establish every individual left/right press, this guide does not pretend that it can. Follow the verified order of objectives, wait for every fall to settle, and compare the relationships between colors and obstacles rather than copying an unproven input string.
Chamber solution
Level 1
Par 3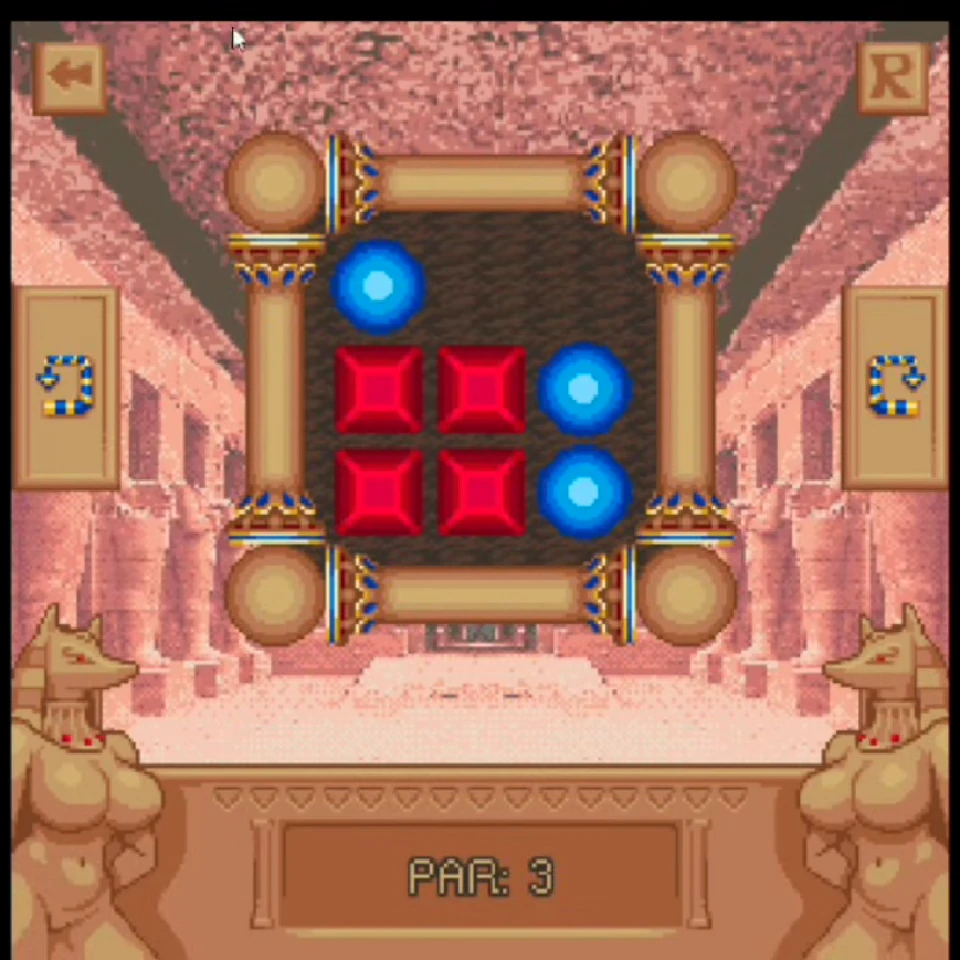
Goal
Remove the red group and the three blue orbs from the open chamber.
Key idea
Use this room to learn that every quarter-turn changes gravity for every loose orb at once.
Step by step
- 1
Read the red cluster as one stable mass and watch the separated blue orb above it.
- 2
Rotate so the loose blue orb falls toward the two blue orbs on the right.
- 3
Let the color groups resolve, then use the remaining turn to finish the room.
Normal clear
Keep matching colors on the same landing edge; there are no stones to trap a bad route.
Optimal / Par
The recovered level file sets the target at Par 3.
Common mistake
Turning again before the previous fall has settled can make the simple opening look harder than it is.
Chamber solution
Level 2
Par 6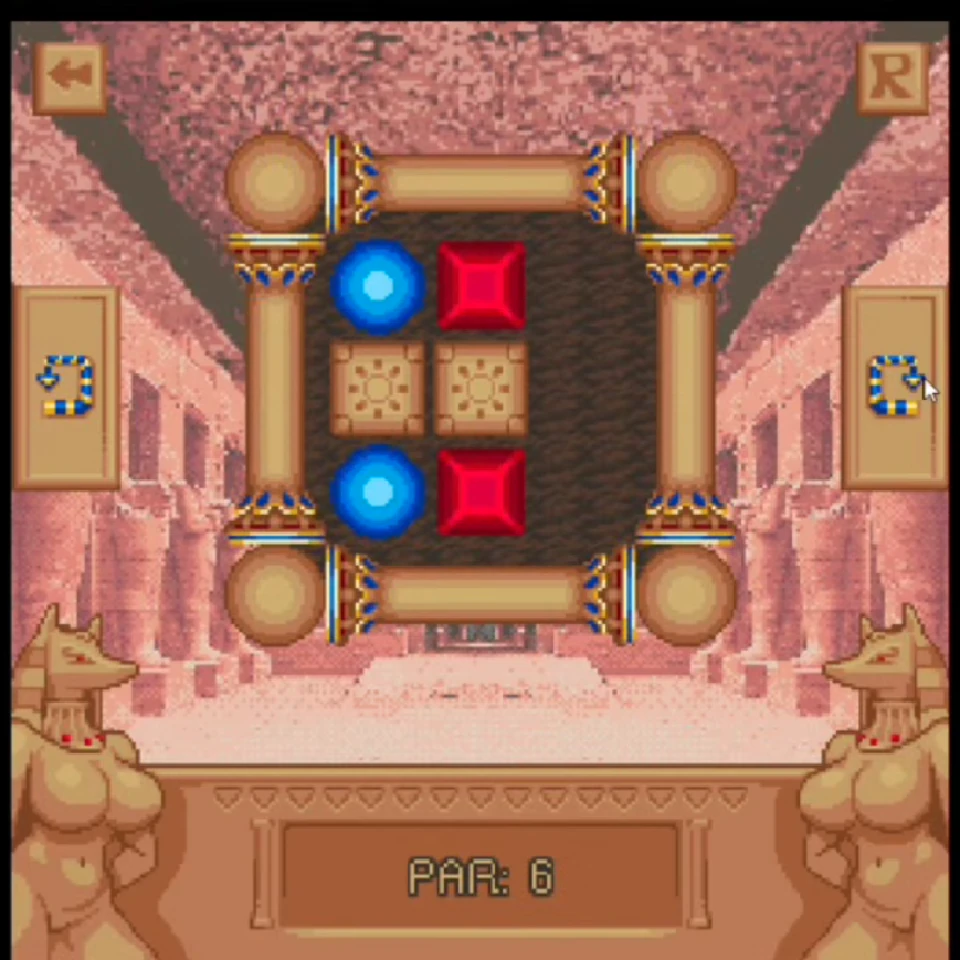
Goal
Bring the two red and two blue pieces together around the first pair of stone blocks.
Key idea
A stone can be a divider now and a useful landing shelf after the next rotation.
Step by step
- 1
Identify which color can reach its partner without crossing the two central stones.
- 2
Use one edge of the chamber to stack that pair, then allow the match to disappear.
- 3
Reorient the remaining pair around the newly open space.
Normal clear
Solve one color at a time instead of trying to line up both pairs in the same fall.
Optimal / Par
The recovered level file sets the target at Par 6.
Common mistake
Parking one color on opposite sides of a stone creates an avoidable extra loop.
Chamber solution
Level 3
Par 4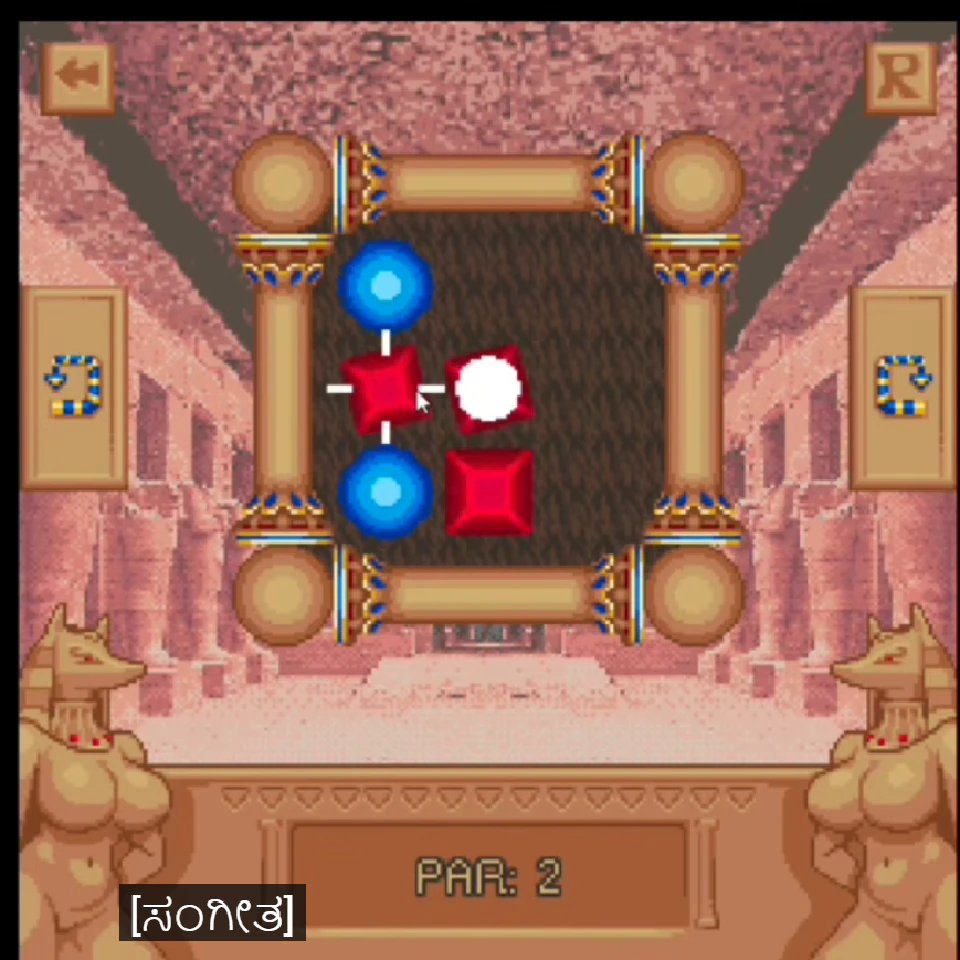
Goal
Clear the larger red-and-blue arrangement without splitting a completed cluster.
Key idea
The chamber is still open, so use broad falls to compress several pieces at once.
Step by step
- 1
Compare the two side edges and choose the fall that compresses the most same-color pieces.
- 2
Preserve any pair that has already formed while moving the remaining single orb.
- 3
Use the final open edge to bring the last color into contact.
Normal clear
Favor moves that reduce the number of separated color groups after every fall.
Optimal / Par
The recovered level file sets the target at Par 4.
Common mistake
Reversing direction immediately can undo a useful stack before it matches.
Chamber solution
Level 4
Par 4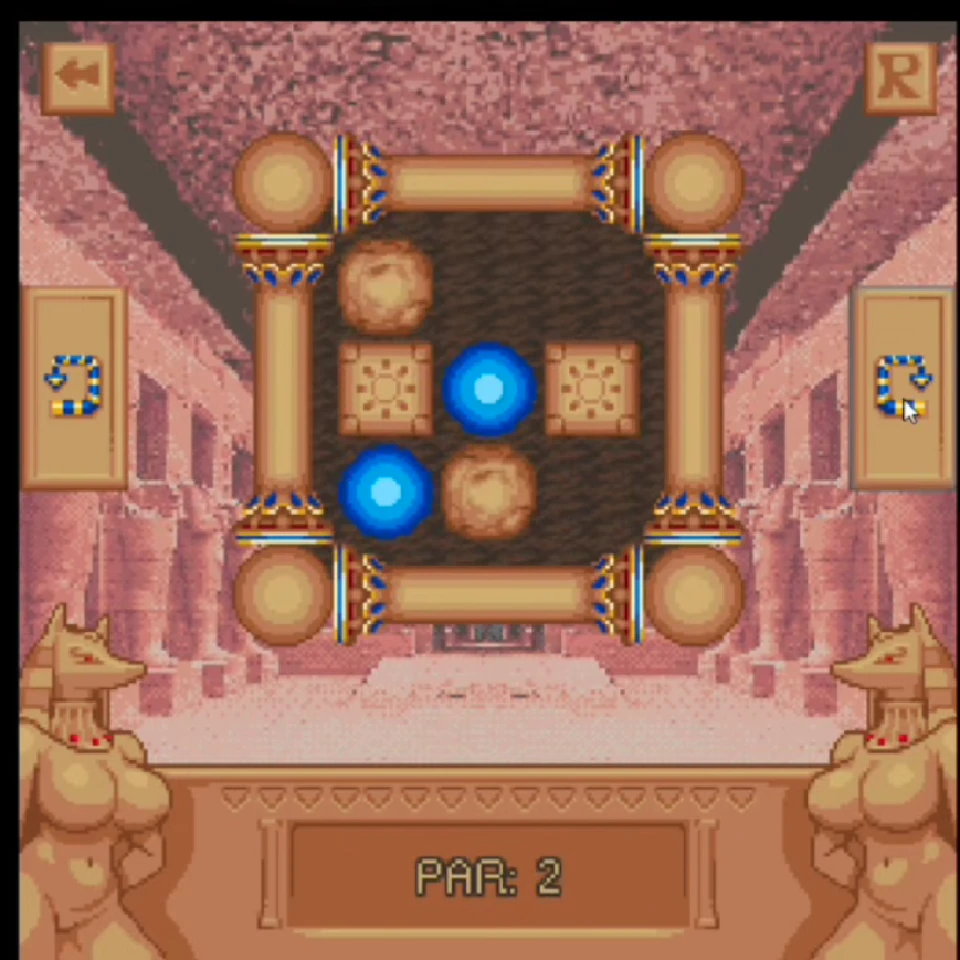
Goal
Join the two blue orbs while a rolling round obstacle changes the available lane.
Key idea
The obstacle moves with gravity too; treat its next resting place as part of the puzzle.
Step by step
- 1
Locate the blue orb that is blocked from a direct fall.
- 2
Rotate until the round obstacle rolls away from the blue landing lane.
- 3
Use the newly opened lane to bring the two blues together.
Normal clear
Move the obstacle first, then solve the color pair.
Optimal / Par
The recovered level file sets the target at Par 4.
Common mistake
Watching only the blue orbs ignores the object that will occupy their landing space.
Chamber solution
Level 5
Par 4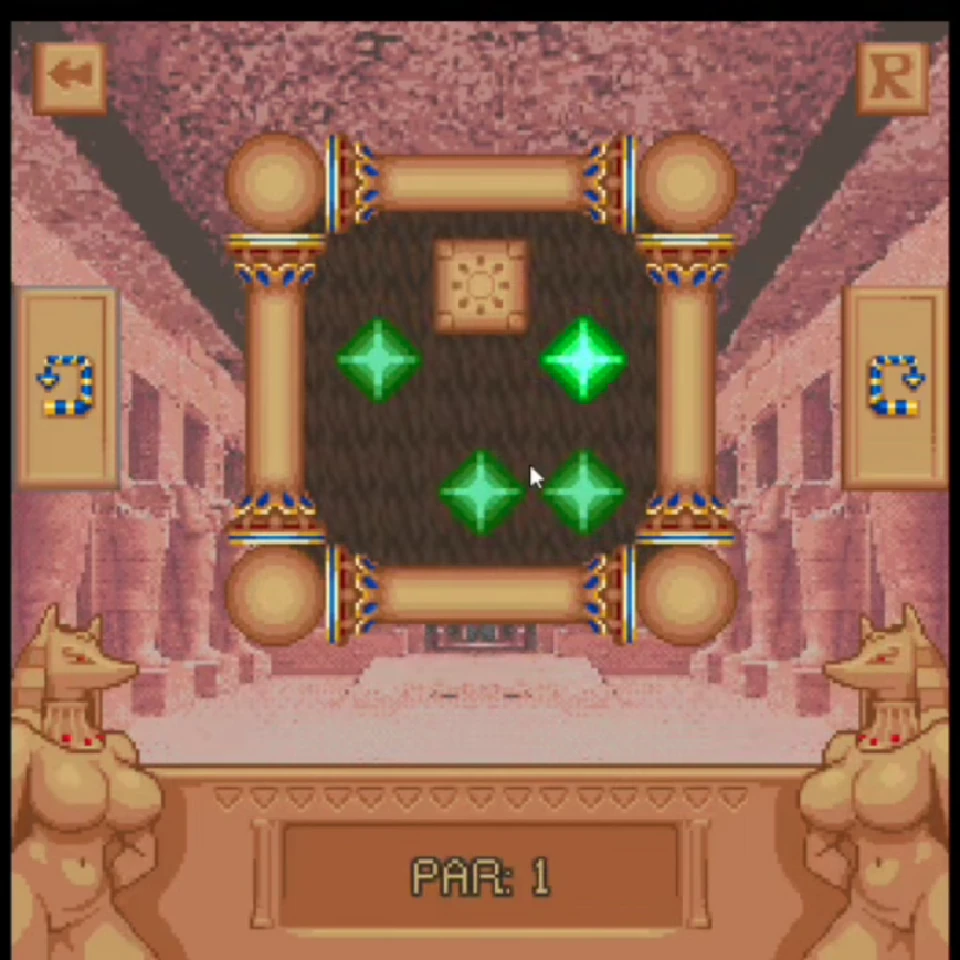
Goal
Collapse the green formation around two fixed stones.
Key idea
Four matching greens can be cleared efficiently when they share one landing line.
Step by step
- 1
Use the stones as a funnel rather than trying to cross through them.
- 2
Turn the chamber so the upper greens feed toward the lower pair.
- 3
Wait for the full green group to connect and clear.
Normal clear
Build one compact green group instead of two separate pairs.
Optimal / Par
The recovered level file sets the target at Par 4.
Common mistake
Settling two greens on opposite faces of a stone blocks the short solution.
Chamber solution
Level 6
Par 5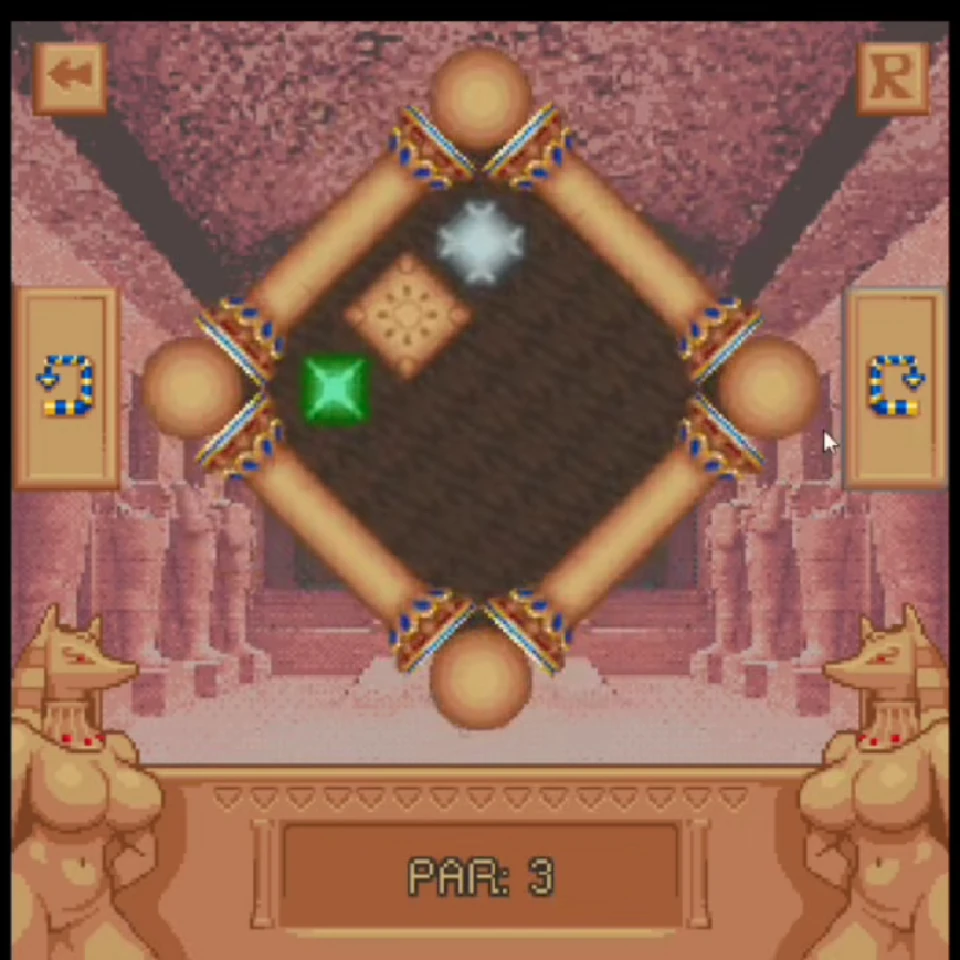
Goal
Clear the first mixed-color chamber with both square and round blockers.
Key idea
A useful move improves at least two colors or moves a blocker out of a future lane.
Step by step
- 1
Choose the color pair with the clearest path and settle it first.
- 2
Track the gray and round blockers during the same rotation.
- 3
Use the space created by the first match to route the remaining colors.
Normal clear
Resolve the easiest pair, then reassess the board instead of following the starting plan blindly.
Optimal / Par
The recovered level file sets the target at Par 5.
Common mistake
Forcing the red piece first can leave another color behind a blocker.
Chamber solution
Level 7
Par 5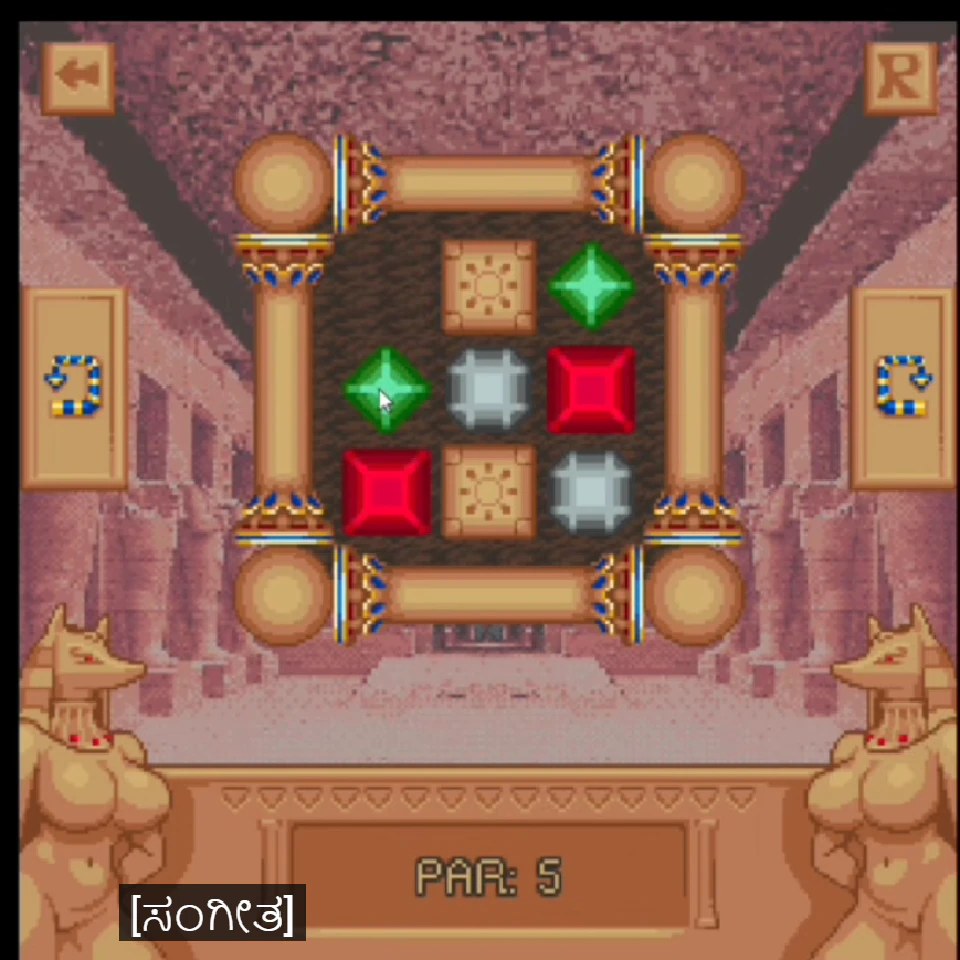
Goal
Use the central stones to sequence green and gray pieces into matching groups.
Key idea
Do not send every loose piece to the same side; the stones create separate arrival lanes.
Step by step
- 1
Pick the pair that already shares a side of the central stones.
- 2
Clear that pair so the central landing area opens.
- 3
Rotate the remaining pieces through the freed lane.
Normal clear
Let each color approach the center from its own lane.
Optimal / Par
The recovered level file sets the target at Par 5.
Common mistake
Crowding all pieces below the same stone can lock the final pair apart.
Chamber solution
Level 8
Par 6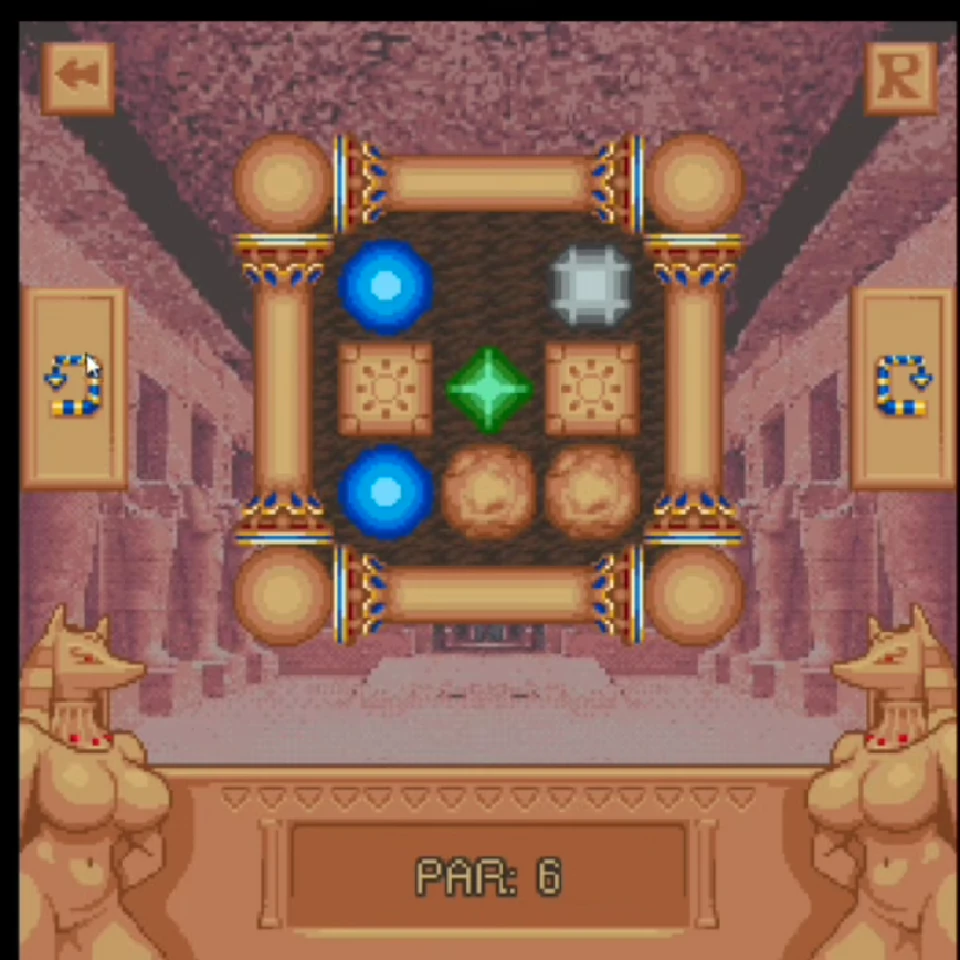
Goal
Clear blue and green pieces while two round obstacles share the chamber.
Key idea
The round pieces can temporarily pin an orb, so open a lane before committing a color.
Step by step
- 1
Watch where both round obstacles will roll after the first turn.
- 2
Use their movement to create a clean edge for one color.
- 3
After that match disappears, route the second color through the larger gap.
Normal clear
Treat obstacle positions as temporary; a blocked lane can open one turn later.
Optimal / Par
The recovered level file sets the target at Par 6.
Common mistake
A direct approach to the nearest match can wedge a round blocker between the pair.
Chamber solution
Level 9
Par 10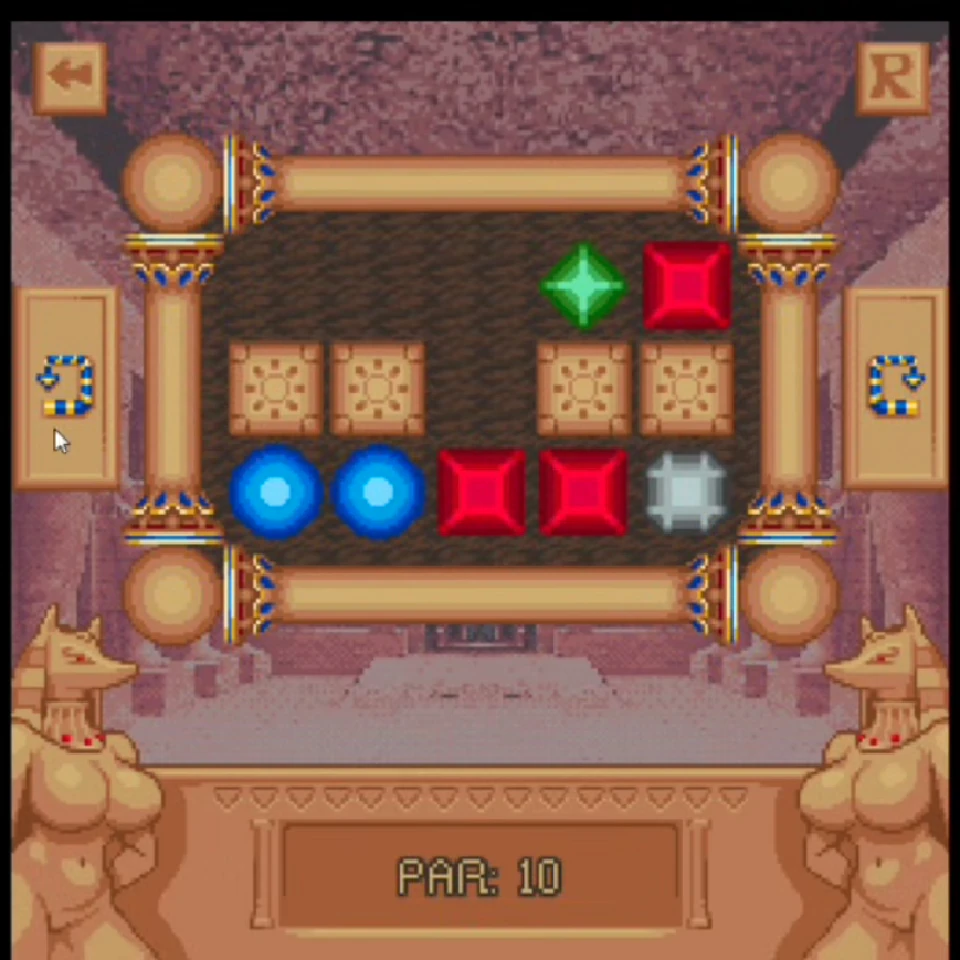
Goal
Untangle four colors from a long row of stones.
Key idea
Work from the outside inward so cleared colors create room around the central wall.
Step by step
- 1
Find the color whose two pieces can meet along an outer wall.
- 2
Clear that outside pair before moving pieces into the center.
- 3
Repeat with the next accessible color and save the most divided pair for the opened board.
Normal clear
Each match should expose a route that was previously blocked by another color.
Optimal / Par
The recovered level file sets the target at Par 10.
Common mistake
Packing red and blue into the narrow center too early leaves no passing space.
Chamber solution
Level 10
Par 12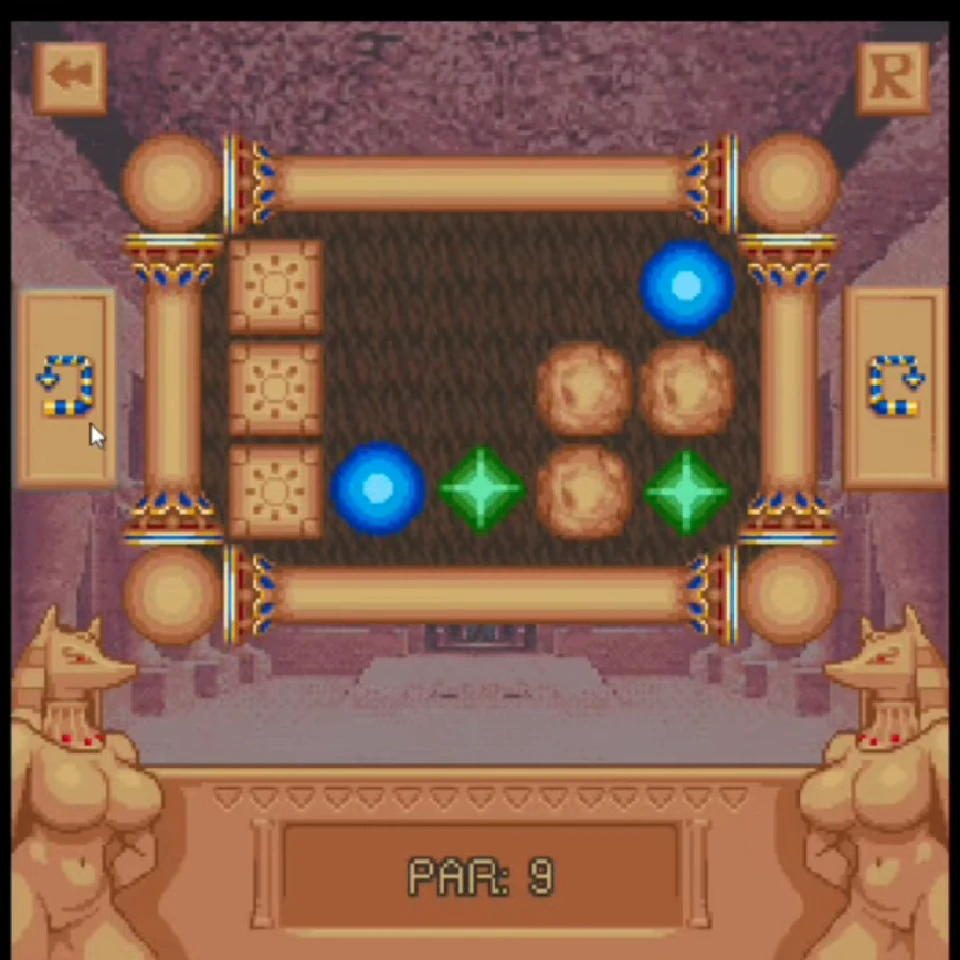
Goal
Clear the green gems before committing the blue pair around the stone-and-round-blocker layout.
Key idea
Green first. Align the green gems on the same lower lane so their removal opens the route for blue.
Step by step
- 1
Ignore the tempting blue alignment and trace a shared landing edge for both greens.
- 2
Rotate until the green gems occupy that lane and let them clear.
- 3
Use the space they leave to bring the blue pieces together without the round blockers between them.
Normal clear
If blue becomes separated, reset and prioritize the green alignment from the opening position.
Optimal / Par
The recovered level file sets the target at Par 12; the video checkpoint shows the green-first route in progress.
Common mistake
Matching or positioning blue first consumes the space needed to join the greens.
Chamber solution
Level 11
Par 7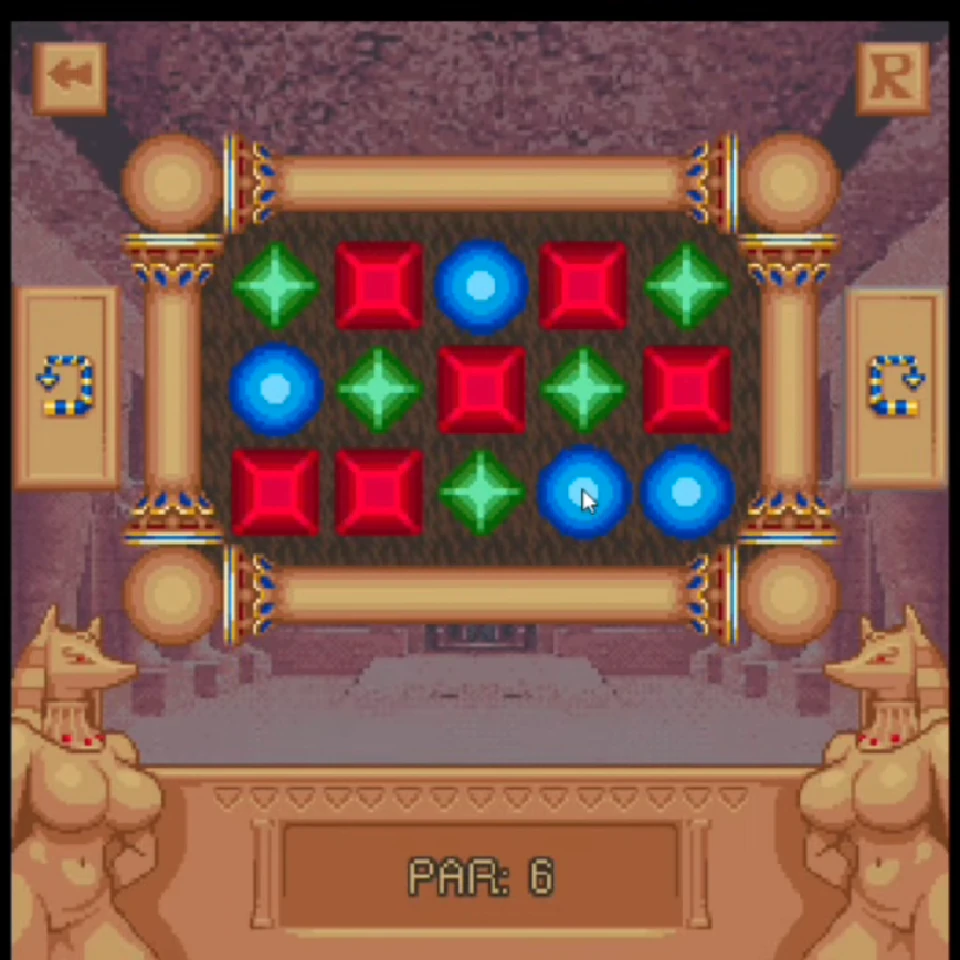
Goal
Collapse a dense board of red, blue, and green pieces with no fixed stones.
Key idea
The crowded opening rewards chain reactions: compress an entire edge, not a single pair.
Step by step
- 1
Count which color has the strongest concentration on an outer edge.
- 2
Rotate to merge that cluster and watch the cleared space reshape the other colors.
- 3
Continue compressing the fullest edge until the final color group meets.
Normal clear
Allow each chain to finish before deciding which edge is now strongest.
Optimal / Par
The recovered level file sets the target at Par 7.
Common mistake
Planning from the untouched opening after a large match ignores how much the board has changed.
Chamber solution
Level 12
Par 11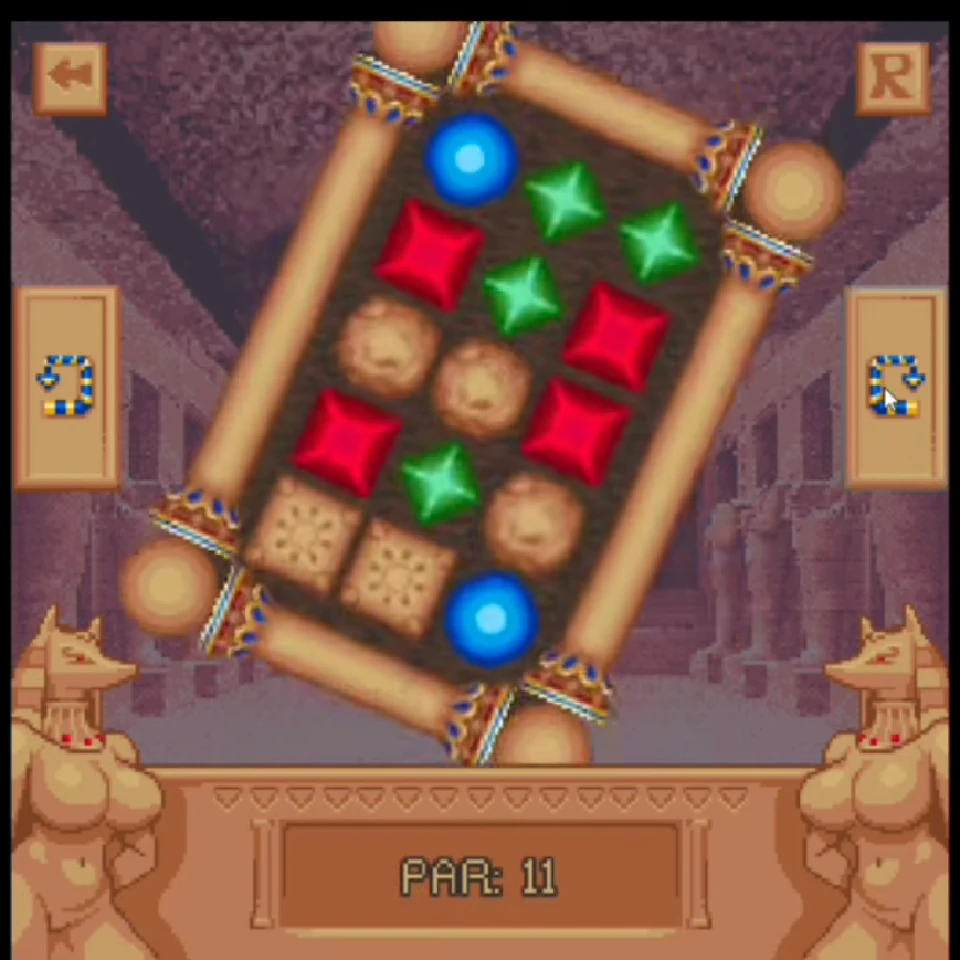
Goal
Route red, blue, and green through a tall obstacle arrangement.
Key idea
Clear lanes from top to bottom and reuse the central shaft instead of circling every color around the outside.
Step by step
- 1
Open the vertical lane by moving the color that already sits nearest its partner.
- 2
Feed the next pair through the center after the first match disappears.
- 3
Keep the last pair on opposite ends of the same shaft, then rotate them together.
Normal clear
The engine target is forgiving, so preserve the central lane even if the route uses extra turns.
Optimal / Par
A verified 7-move solution exists; the recovered level file displays Par 11.
Common mistake
Sending a round obstacle into the central shaft forces the colors to take the long route.
Chamber solution
Level 13
Par 11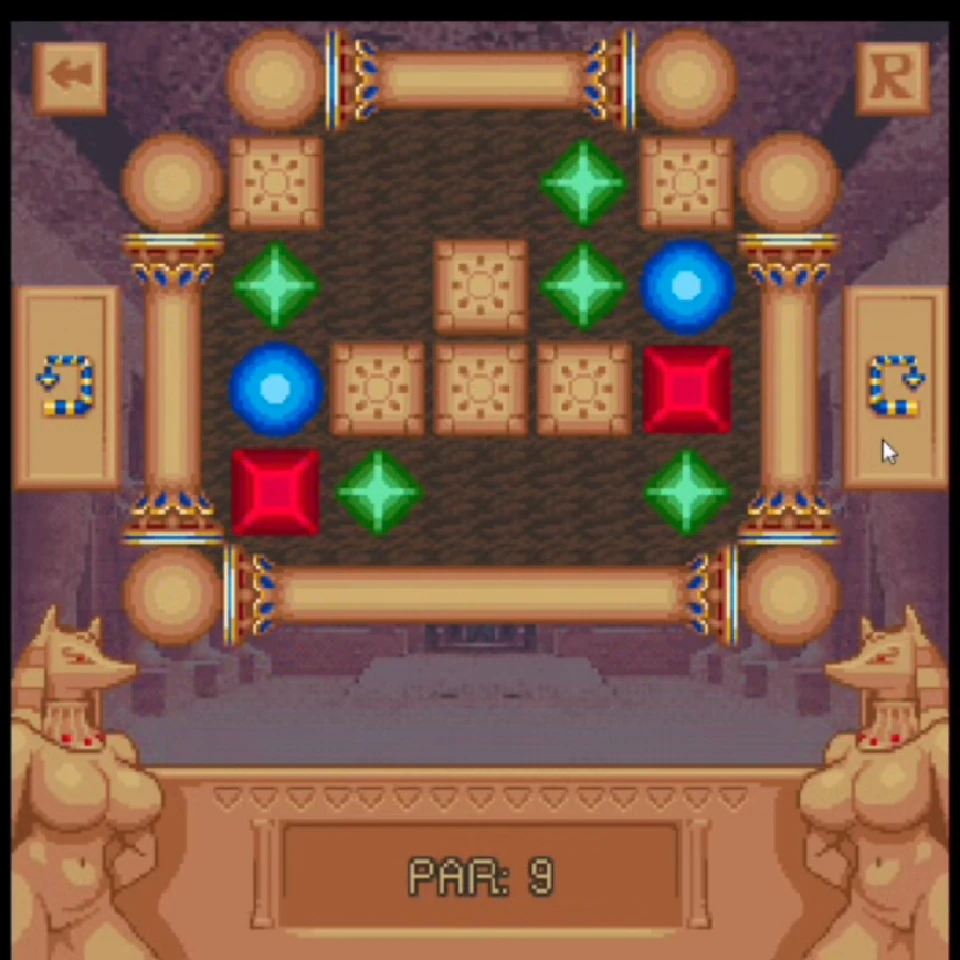
Goal
Separate the mixed cluster so blue travels down and green travels up.
Key idea
Blue down, green up. The two colors need opposite destinations before the red pieces can settle safely.
Step by step
- 1
Use the first rotations to give the blue pieces a clear downward lane.
- 2
Preserve an upward route for the green pieces rather than stacking every color at the bottom.
- 3
After blue and green resolve, use the open center to finish red.
Normal clear
Judge each turn by whether it maintains those opposite blue and green routes.
Optimal / Par
The recovered level file sets the target at Par 11.
Common mistake
Dropping every color to the same edge mixes the groups around the central stones.
Chamber solution
Level 14
Par 9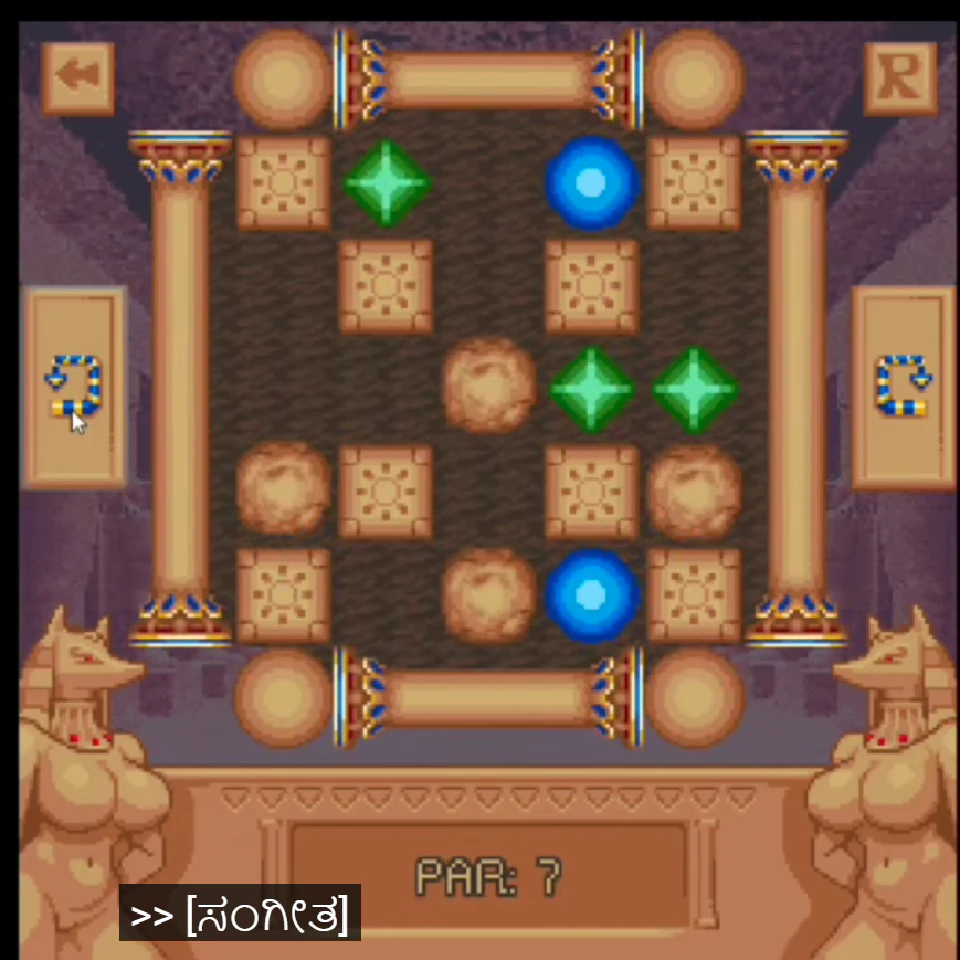
Goal
Move blue and green around separated stone shelves and rolling blockers.
Key idea
Create a clean corridor on one side before trying to complete either color.
Step by step
- 1
Choose the side with fewer stones as the working corridor.
- 2
Roll the round blockers away from that corridor while keeping one color nearby.
- 3
Clear the first color, then reverse the board flow for the second.
Normal clear
A temporary detour is useful when it keeps the working corridor open.
Optimal / Par
The recovered level file sets the target at Par 9.
Common mistake
Alternating sides every turn prevents either corridor from becoming clear.
Chamber solution
Level 15
Par 11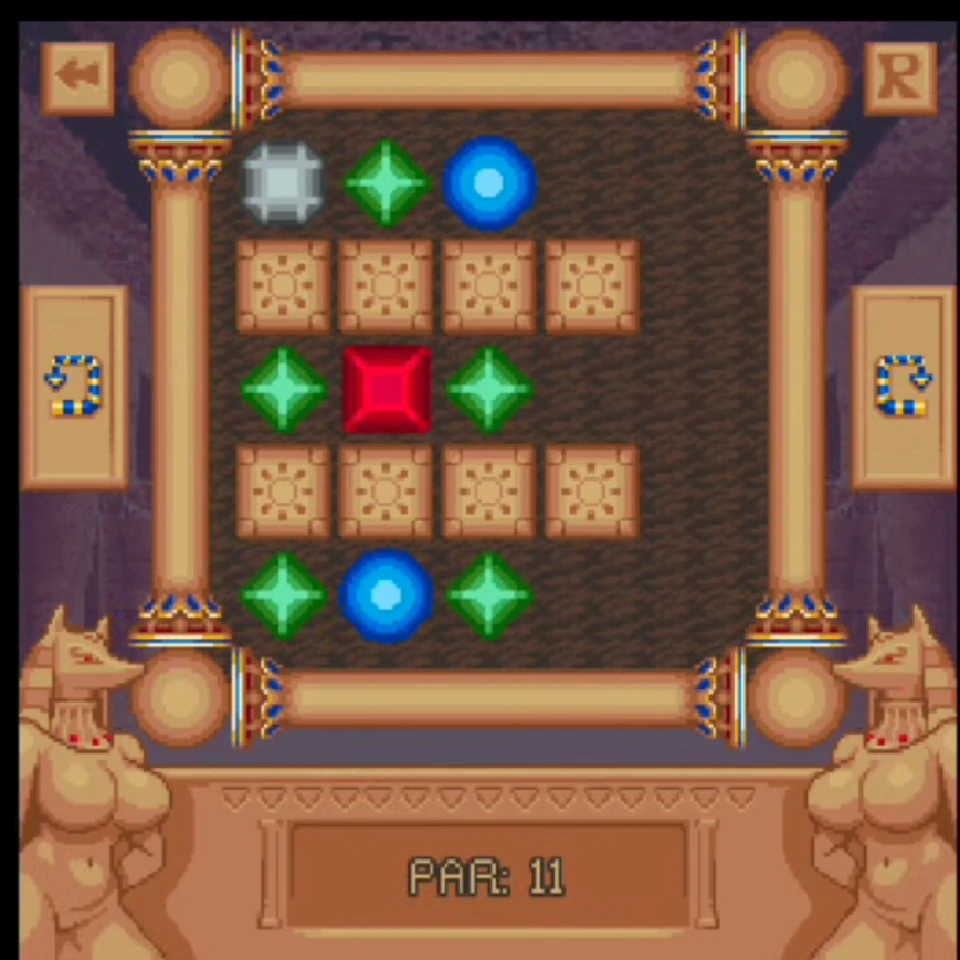
Goal
Unpack the dense stone grid and clear all four colors.
Key idea
Move the objects from top to bottom first. This creates the vertical breathing room needed for later matches.
Step by step
- 1
Use the opening turns to transfer the loose objects above the grid toward the lower half.
- 2
Keep the newly opened top cells clear while matching the most accessible color.
- 3
Route the remaining colors through the vertical space created by that top-to-bottom shift.
Normal clear
Reset if the upper cells become blocked again before the first color clears.
Optimal / Par
The recovered level file sets the target at Par 11.
Common mistake
Trying to match sideways before moving the top objects down keeps the grid congested.
Chamber solution
Level 16
Par 9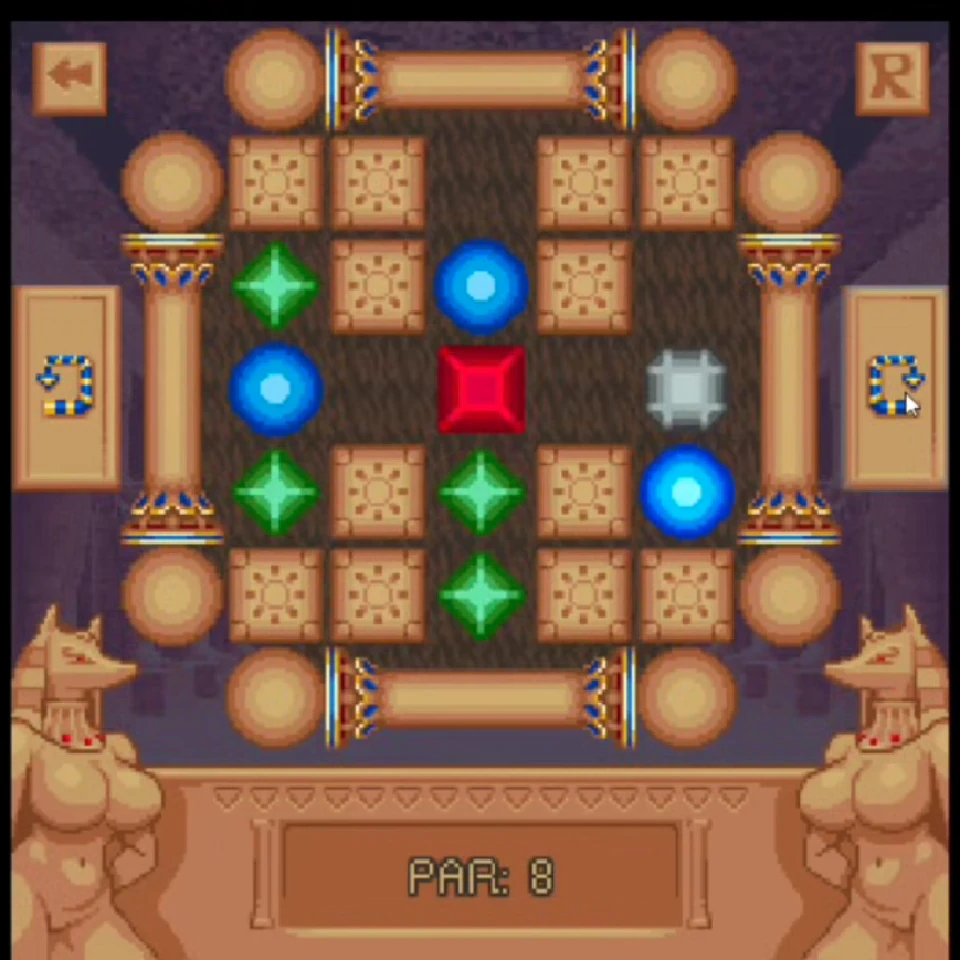
Goal
Guide the mixed colors through a narrow maze of stone columns.
Key idea
Use the outer pockets as staging areas; the center cannot hold every color at once.
Step by step
- 1
Park one color in an outer pocket while another crosses the center.
- 2
Clear the crossing color to release the middle lane.
- 3
Bring the parked pieces back only after the center is empty.
Normal clear
Think of the edge pockets as safe waiting rooms rather than dead ends.
Optimal / Par
The recovered level file sets the target at Par 9.
Common mistake
Bringing all loose pieces into the center creates a traffic jam between the columns.
Chamber solution
Level 17
Par 16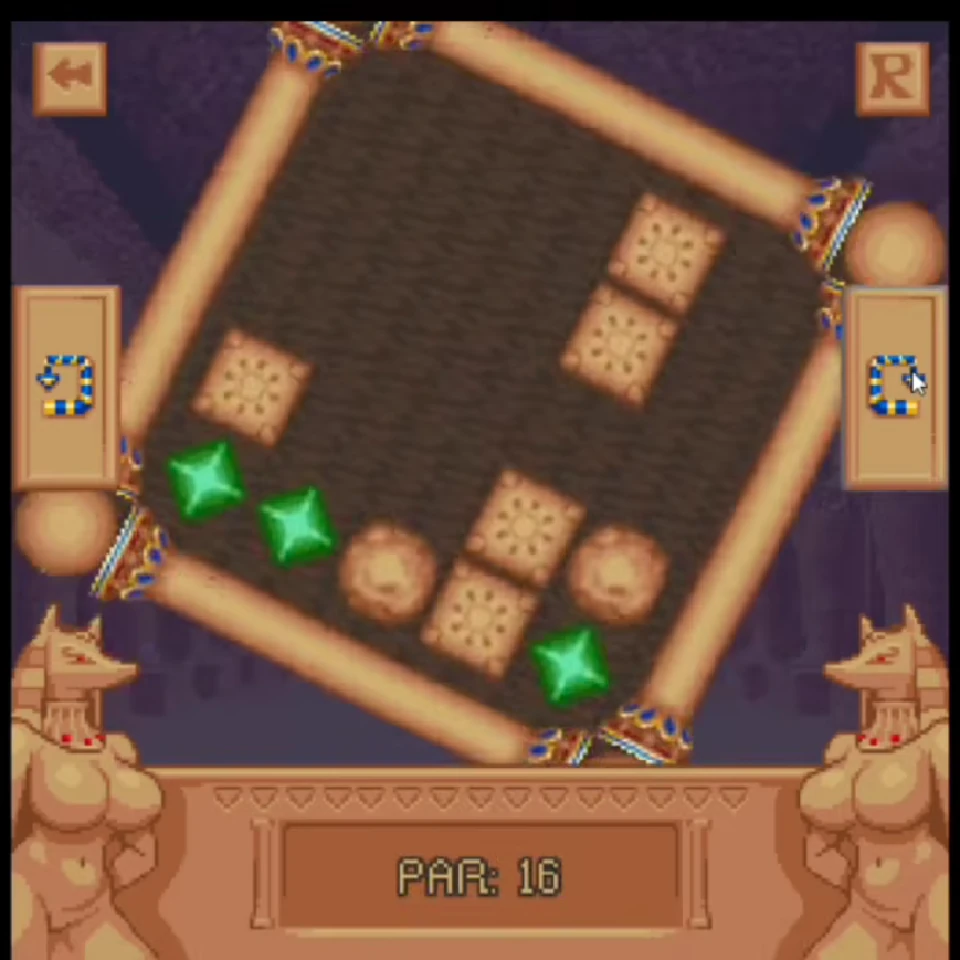
Goal
Release the two green gems from the rock-and-slot mechanism, then join them.
Key idea
Use the rocks to release the green gem in the slot. This chamber is about moving the mechanism before chasing the match.
Step by step
- 1
Track which rock can roll into the position that frees the slotted green gem.
- 2
Cycle the chamber until that rock moves the mechanism and the green enters the open field.
- 3
Keep both greens on a shared outer edge and bring them together.
Normal clear
The long setup is intentional; focus on the slot state rather than the current distance between the greens.
Optimal / Par
The recovered level file sets the target at Par 16.
Common mistake
Repeatedly steering the free green toward the slot does not release the trapped one.
Chamber solution
Level 18
Par 12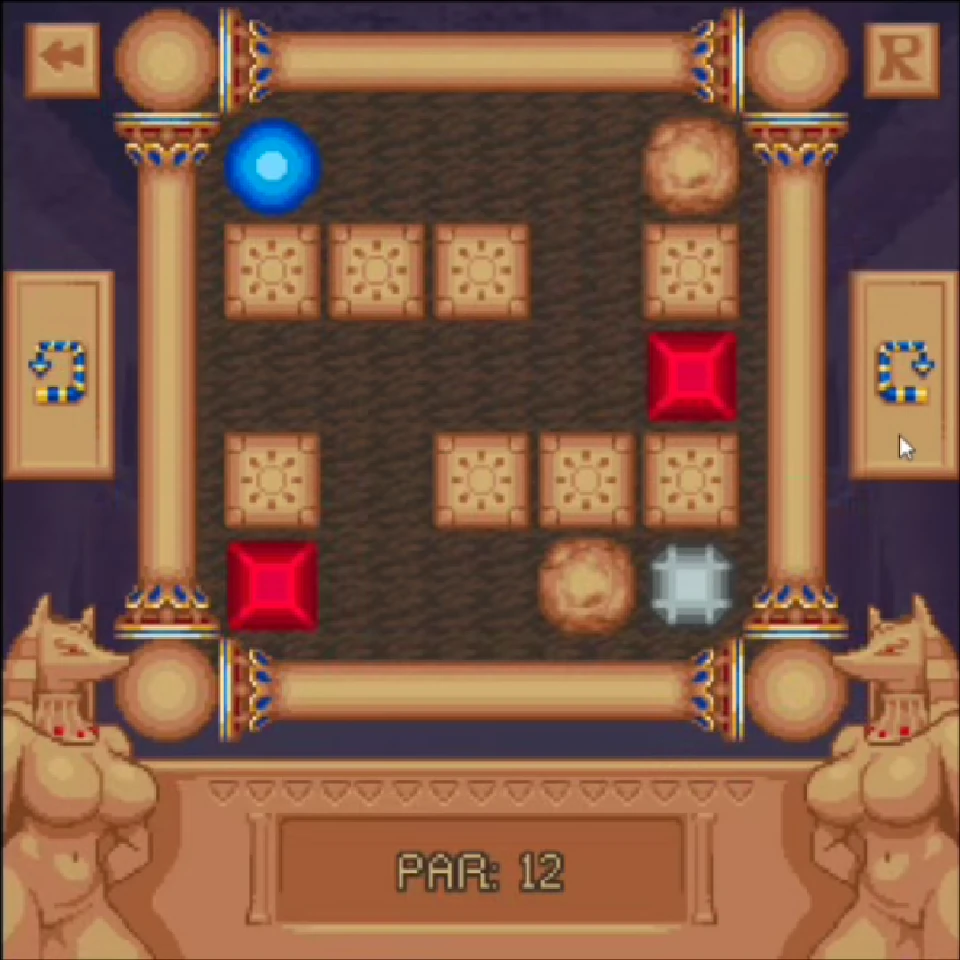
Goal
Navigate the final blue, red, and gray pieces through the broken stone maze.
Key idea
Preserve the central crossing until two colors are cleared; the last piece then has a simple route to its partner.
Step by step
- 1
Choose the pair that can use the central crossing without a round blocker following it.
- 2
Clear that pair and keep the newly opened middle cell available.
- 3
Route the second pair through the middle, then finish the last color along the outer edge.
Normal clear
If a round blocker settles in the center, use an extra rotation to move it before committing a color.
Optimal / Par
A verified 10-move solution exists; the recovered level file displays Par 12.
Common mistake
Using the central crossing as storage blocks every later route in the final chamber.
Progress and content note
Bonus scene unlocks
Completing the puzzle route advances the in-game unlock path toward two additional story scenes. Those scenes contain explicit adult material and are not suitable for anyone under 18. This walkthrough deliberately uses puzzle-board checkpoints only and does not reproduce the mature scenes.
The site's Chamber Progress tracker is a private manual checklist and is separate from the game's own save. To retain the actual unlock state, continue in the same browser profile and avoid clearing storage for the game host.
Mobile, saves, and solutions
Walkthrough FAQ
01How many puzzle levels are in Temple of the Jackal?+
The main puzzle route contains 18 chambers. This walkthrough keeps all 18 solutions on one page so you can jump directly to the room that stopped your run.
02What do the left and right buttons do?+
Each button rotates the whole chamber by ninety degrees. Gravity then carries every loose orb and movable obstacle toward the new bottom edge.
03Do I have to beat Par to continue?+
No. Par is an efficiency target, not a gate. Clear every colored piece to finish a room; you can return later and reduce the number of turns.
04Is there a seven-move solution for Level 12?+
Yes. A seven-move clear is documented for Level 12 even though the recovered level file displays a more forgiving Par 11 target.
05Can Level 18 be cleared in ten moves?+
Yes. A ten-move optimized clear is documented for the final chamber; the recovered level file displays Par 12.
06Does the browser version save completed rooms?+
The game relies on browser-managed storage. Use the same browser profile, avoid private mode, and do not clear site data if you want to retain game progress.
07Can I play on Android or iPhone?+
The game can load in a modern mobile browser, but a landscape tablet or desktop is easier for reading the square board. Use fullscreen, wait for each fall to settle, and tap Retry below the player if the embedded build fails to load.
08Where do the walkthrough images come from?+
Every level image is a checkpoint captured from the linked Temple of the Jackal solution video. The Par values were checked against the recovered Godot level files.